Tuesday, January 31, 2012

Topped Ramen: Number 2

I decided to get a little adventurous. So, I tried Oriental flavored Top Ramen...apparently I don't really like it as much as the chicken or beef flavors. It wasn't bad tasting, it just wasn't great...I also ended up feeling sick afterwards, but that is probably mostly my body's fault, not the recipe.
This time, I included a lot more ingredients than I did last time. In addition to my Oriental flavored Top Ramen, I added some canned chicken, sweet peas, and some black olives. The peas and olives especially added some tastiness to this meal. The chicken was a little odd since I'm not used to canned chicken, and possibly added to the fact that I felt too sick to even finish my meal. However, it did add some much needed protein. I think it's one of those food items that I'll get used to over time. I think, too, if I start using my own sauce, I might be able to add flavor to the entire dish, instead of having flavored noodles with bland meat stirred in later. I'm still experimenting with everything...obviously.


I'd suggest trying this one out if you're a fan of oriental flavored Top Ramen and if you are already used to eating canned chicken. It really isn't all that bad, it just made me sick... (yeah, I'm probably not selling this one too well, am I?)


Dorm Food

 Subscribe in a reader

Wednesday, January 25, 2012

Topped Ramen: Number 1

The time has come. I have begun to eat Top Ramen. It's time for true college food now. I'd like to thank my brother for giving me an electric kettle for Christmas, as well as the school for now selling Top Ramen in their new market (which is pretty much a mini-convenience store in the basement of the cafeteria, which uses meal points to pay for purchases instead of actual cash).
If I were to just eat Top Ramen as per the actual instructions on the packaging, this blog would be pretty boring, as would my meals. So, instead, I introduce to you Topped Ramen. From time to time, I will be sharing different ways that I have improved these instant noodles. Some of the inspiration comes from Serious Eats: Ramen Hacks, while some, too, comes from the Ramen Homepage.
My first Topped Ramen is extremely simple and only requires two ingredients. Yet, it tasted much better than plain top ramen. To make it, just follow the instructions on the packaging using as much or as little of the seasoning as you want. I also poured out some of the water, which makes the flavor a bit more concentrated so I didn't need to use as much and it also made it a bit less soupy. Then, I simply added a few whole, pitted black olives. I did this with Beef Flavor Top Ramen, but any brand should work, and I am sure other flavors would work quite well, too.


This ended up tasting delicious and it was super easy, fast, and cheap to make. There were very few ingredients used to make it. However, it was absolutely not healthy. While scientifically, olives are considered a vegetable, when it comes to nutrition, they should be considered an oil. Not to mention, each package of Top Ramen includes 2 servings of noodles. That makes the entire package (with flavoring) have about 22% of your daily fat intake. Plus, both olives and Top Ramen are high in sodium. So, it's not intended to be a nutritious meal, by any means. But it is hot and tasty, which was all that was important when I made this.


 Subscribe in a reader

Wednesday, January 18, 2012

Back for More

Spring semester began on Monday, so it's official: I'm back. Which is lovely, really, because I enjoy my dorm, I enjoy learning, and I enjoy being at school in general.
Over break, I didn't really do all that much cooking. Actually, after Christmas, I didn't do all that much of anything. I had several doctors appointments and spent most of the rest of my time with my boyfriend (I'm slightly concerned with the fact that I may be becoming one of those girls who spend all their time with their boyfriends and not with their friends, but to be fair, my friends were in school while I was enjoying an entire month away from school). I did end up playing Zelda, which was something I've been told to do for quite some time. And, most importantly, I did end up with a few answers about my stomach aches. It turns out I have some decreased functionality in my gallbladder, as well as a hernia in one of the muscles around my stomach, which caused a bit of bleeding, apparently. It took several doctors appointments including two outpatient procedures at two separate hospitals, but I finally have a few answers. Now comes the fun part of visiting a surgeon over spring break, and we can decide what to do from there.
Anyway, now that I am back to school, I will be getting back into the habit of blogging. Besides cookies, I didn't make very much that was blog-worthy over break. But now, I'm back and I have plans for some amazing food in the months to come.
So far, I've been enjoying a lot of oatmeal and hot chocolate, thanks to my brother who gave me an electric kettle for Christmas. It's been slightly snowy (though until last night, nothing was sticking to the ground...and today everything was just a slushy mess by the time I was heading off to class), so a nice mug of hot chocolate and a bowl of oatmeal every morning feels absolutely perfect. In addition, I've been munching on some quiche, which, as my mother loves to point out, can serve as breakfast, lunch, or dinner! Essentially, that is all I've been eating in my dorm room. My cafeteria eating has been pretty limited as it is quite cold and wet outside so I've been trying to avoid evening food ventures.
Basically, that's about it. There's not all that much to say since it's only my third day back to school and not too much has happened yet. As this is a new semester, I'd like to start fresh with my blog so if you have anything you'd like to see on here, leave me a comment and I'll see what I can do. Just a warning, now that my brother has given me this electric kettle, I may start experimenting with TopRamen...be warned.


Dorm Food

 Subscribe in a reader

Sunday, December 25, 2011

Cute Christmas Cookies

One post with two recipes? Yup, that's what this is. It's Christmas time, which means time for lots and lots and lots of cookies. Last year I made over 500 cookies in just the week of Christmas. This year I didn't make quite that many, but I still made plenty enough to share with you.


Cookie Number One: Sugar Cookies
The first recipe is for sugar cookies. I borrowed this recipe from Our Best Bites, and man they were delicious. My mom and I attempted to make icing but somehow ruined it, so the cookies remained plain and undecorated but even so the sugar cookies tasted quite delicious. I'm so grateful to have found this wonderful recipe. I shall never use another sugar cookie recipe again...especially since it only had an hour of chilling time, compared to the couple hours needed for my other standby recipe.

Ingredients:
1 cup of real butter (2 sticks)
1 cup of sugar
1 egg
1 1/2 teaspoons of vanilla extract (or almond, though I used all of my almond up making macaroons the other day)
3 cups of flour
1 1/2 teaspoons of baking powder
1/2 teaspoon of salt

First cream the softened butter and sugar together for about 2 minutes, using an electric mixer.
Next, add the egg and extract and mix thoroughly.
In a separate bowl, mix the flour, baking powder, and salt together.
Slowly add the flour mixture to the butter mixture and mix thoroughly. It will end up tasting so delicious...but unless you're doubling the recipe, try your best to avoid eating all the dough.
Now, cover the bowl with press and seal wrap or similar plastic covering. Then place it in the fridge to chill for an hour. (There's another trick for this step, but I didn't get a chance to try it that way).
When it's chilled, take the dough out of the fridge. If the dough is too crumbly, you probably measured something incorrectly but you can fix it by adding a bit of water. Don't add too much, though.
Now, roll it on a floured surface (using a rolling pin that has also been floured). Make shapes using cookie cutters and place them on greased cookie sheets.
Finally, bake for about 8 minutes at 350 degrees.


These ended up tasting so delicious. I will save this recipe and use it every time I need to make cookies. mmmmmm

Cookie Number 2: Peanut Butter Cookies
The second type of cookie is peanut butter cookies. I saw the design idea on Pinterest (which is a wonderful site if you haven't already visited it). I must be honest, I cheated. I used a pre-made package by Betty Crocker. But, for these cookies the point was to make them very cute. Which, if I do say so myself, I did manage to do.
To make these cookies, I first followed the instructions on the package. Before baking, I flattened them using a fork to make a crisscross pattern, then used my washed fingers to smooth the surface.
When they came out of the oven, I decorated them with cold candies. Half of them were thumbprint cookies using chocolate kisses.
The other half were reindeer cookies. Chocolate covered pretzels made perfect antlers, and M&Ms made the eyes and noses. They have to be refrigerated or frozen first to keep them from melting. This part is very important so don't forget...melted chocolate makes a terrible mess, so don't let it happen to you. You may, also, want to put the cookies in the fridge after you decorate them, in effort to help the candies set in the cookies.


These cookies ended up so adorable. I got several compliments for them. And they were super easy to make, to boot. These could easily be made in a dorm, assuming you have an oven. They're so cute and easy, I can't believe I haven't done it before.


Dorm Food

 Subscribe in a reader

Friday, December 23, 2011

Coconut Macaroons at Home

A lot of people from school were excited to get home to a kitchen. But me? I live in a dorm full of kitchens (8, to be exact). I have an oven at school. So, what I was really excited for was the plethera of ingredients that I don't have to pay for, as well as an electric mixer. And what is a girl to do with such items? Why, make her favorite fancy cookie, of course: home made macaroons.
These are not cookies that can be easily done in any dorm room. But, they are delicious and super fun to make, so I hope you will accept this recipe anyway. This recipe is adapted the Joy of Cooking cook book (a book that is so worn, it no longer has a cover, or a spine, and is split in half because the glue is coming undone).
Ingredients:
2 egg whites
6 cups of moist shredded coconut
1/4 teaspoon of salt
1 1/2 teaspoons of almond extract
1/2 teaspoon of vanilla extract
2/3 cup of sweetened condensed milk
First, separate the whites from the yokes of two eggs. This is tons of fun for anyone who hasn't done it before. There are two ways to doing it, but personally I prefer to use the shells to separate the whites. simply pass the yoke back and forth between the two halves of the shell after you crack the egg, trying to get it to the point that all of the egg whites are below you in a bowl, and the egg yokes are in the shell. This way works if you have mastered the art of cracking eggs. If you haven't, you can use your fingers and simply pass the yoke back and forth between your hands so that your hand has the yoke and the bowl has all of the whites. This way is a lot more difficult to do. Help With Cooking has wonderful directions on how to separate egg whites and yokes.


Next, stiffly beat the whites. This should be done using a mixer on a low-medium speed (I had mine at about level 2 out of 5) for several minutes until your liquidy egg whites have become super fluffy.


Beat for about 5 minutes or so and your egg whites will look like...


this!
In a separate bowl, combine the coconut, almond, vanilla, and salt.


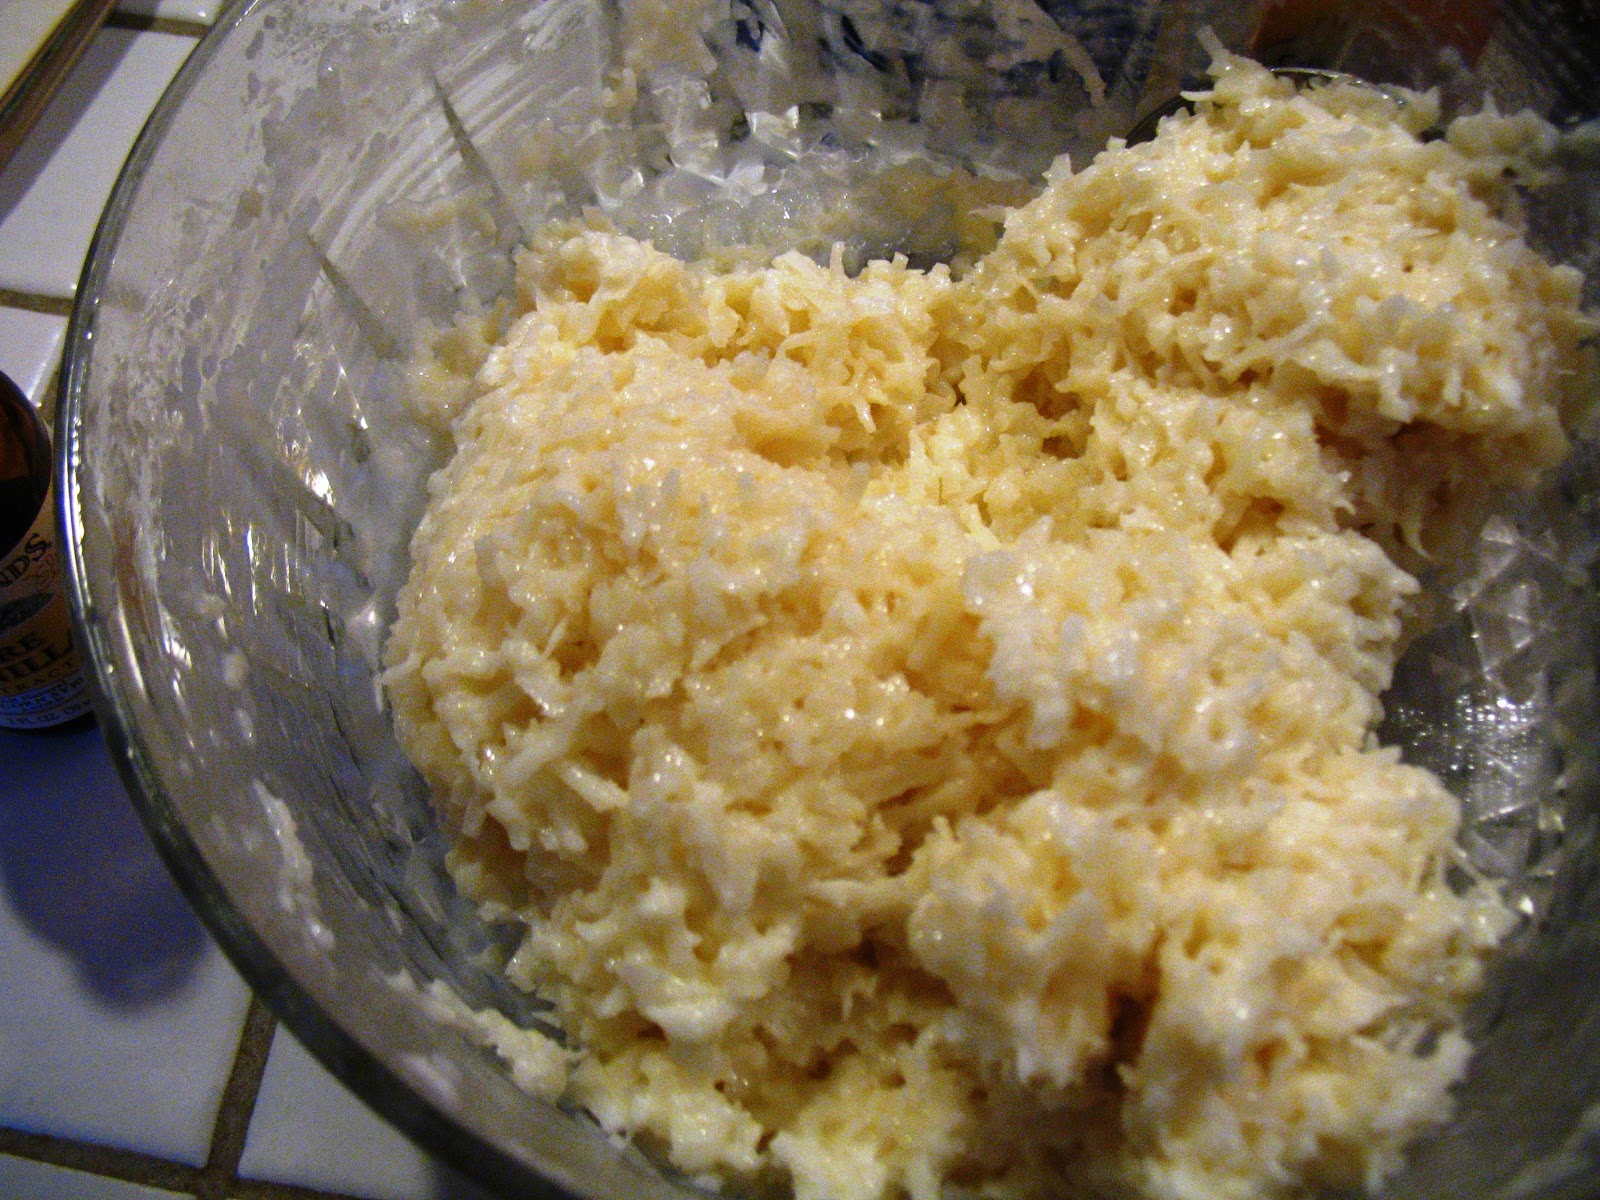
Then, add the sweetened condensed milk, to make a thick paste.
Next, fold egg whites into the batter.


Now, roll the paste into balls onto a well-greased cookie sheet about 2 inches apart. Bake 8 to 10 minutes in an oven heated at 350 degrees, until edges are lightly browned.


When they come out of the oven, you have several options. You can leave them just as they are, or place chocolate kisses and marishino cherries on top.


The end result was quite tasty. Be warned, you will need to wash your hands constantly while you handle the eggs. Also, you will be probably tempted like I was to eat much of the dough. It's so delicious throughout the baking process. But your hands will become quite sticky if you keep doing that, so make sure to have lots and lots of soap in your kitchen while you make these cookies.
I highly recommend you make these if you are willing to take the chance. And if you like coconut. And if you're not currently staying in your dorm.

Dorm Food

 Subscribe in a reader

Tuesday, December 20, 2011

How (Not) to Make Sugar Cookies (Vegan)

So, finals are finally over. My GPA ended up being not so bad...I kept it a decent amount above a 3.0 and it ended up being higher than my lowest semester GPA of high school, though slightly below my high school cumulative GPA. Miraculously, I got out of French with a C, a grade that I am quite proud of obtaining. Otherwise, I mostly got A's, which makes me quite glad.
Just before studying for finals began, Anna and I decided to get our Christmas spirit on. So, we headed out to Target for some Christmas shopping. We left with wrapping paper, gifts, candy canes, a wreath for our door, glittery ornaments, an illegal Christmas tree (apparently, you're not allowed to have a Christmas tree in a dorm...ooops), a package of sugar cookie mix, and some frosting (which happens to be accidentally vegan).
Our awesome Christmas tree.

When we returned to our humble abode, we decided to make some sugar cookies, of course. Anna is vegan, so we needed a substitute for the egg and butter that the mix required. However, we forgot to purchase said substitute. Luckily, we knew what to do (or at least, we thought we knew what to do). So, here's our recipe:
Ingredients:
sugar cookie mix
2 individual portion-sized containers of applesauce
1 banana
1 spray oil (like Pam)
frosting (Pillsbury, Betty Crocker, etc)
sprinkles

First, mash the banana into a pulp. Make it as creamy as absolutely possible. We used a fork to do this part.
Then, in a large bowl (we used a pot, as we do not have a mixing bowl), combine the sugar cookie mix with the applesauce and banana. We used a wisk to combine these ingredients.
Stir it until it becomes doughy. Then stir it a little bit more. This will build up your biceps...so this recipe must be good for you (especially when you consider the amount of fruit in these cookies).
Then, place round globs of dough on a greased cookie sheet. You might want to flatten it a bit (we didn't do this and our cookies never fully flattened while they were cooking).
Bake following the instructions on the back of the sugar cookie mix. It may need a little bit longer to cook, and it will not brown on the outside like traditional sugar cookies should.
Remove from the cookie sheet and instantly frost (using a knife or a handy-dandy frosting tool of your choosing).
While the frosting melts on the warm cookies, decorate with sprinkles. Work fast.
Then, put the cookies back in the oven for no more than a minute or two, until frosting looks melted.


Let them sit for about an hour or two, to let the frosting harden (it will end up crunchy like royal icing)
Then, place them on a plate to be shared and slowly enjoyed.
Be sure to clean up the mess too. You especially want to clean up the cookie sheets because the frosting will get really gross and hard to clean up if you leave the cookie sheet uncleaned for too long.
This was really fun to make. Anna and I especially enjoyed our decorations, which weren't so conventional.
This is Anna's scientist cookie (note the different types of sprinkles represent different bacterium). 

This is my atheist cookie (note the gorilla sprinkles for the belief in evolution). 

Our cookies ended up looking very cool. And they ended up being vegan. But beyond that they weren't all that good. I mean, they were edible, but they did not taste like sugar cookies, nor did they cook properly. Apparently applesauce and bananas can only be used as substitutes for things like bread and muffins, not cookies. So, therefore, I cannot truly recommend that you make these cookies. Perhaps using egg and butter substitutes from the store is a better idea, if you want to make vegan sugar cookies.

Dorm Food

 Subscribe in a reader

Thursday, December 8, 2011

Canned Soup with Fresh Vegetables


Hmmmm....it's been a while since I actually posted a recipe. Sorry about that, guys. I swear I have excuses. I was sick; I was busy; it's getting toward the end of the semester so everything's hectic; and most importantly, I really haven't made anything lately. Every meal has been purchased (even breakfast...which lately has been a bagel and a banana, since they sell those at the coffee stand in the building all of my morning classes are in). But I have a recipe for you today. Isn't that nice of me to do since this is pretty much my equivalent of a job?
Actually, today's recipe isn't much of a recipe either. It's just the last thing I made in my room. So, here's the story:
I had this can of soup (which you might remember from Homemade Soup on a Very, Very Long Day). And, this can of soup has been sitting in my food crate beneath my bed for a very, very long time (try like 2 months). I've been saving it for my first cold. But, the other day (well, more like three weeks ago), I decided I was no longer waiting. I was tired and it was cold outside and I did NOT want to go all the way to the cafeteria just to grab dinner. And since I had nothing else edible in my room (with the exception of candy and Easy-Mac), I was left with only the can of soup to eat. So I ate it. Even though I wasn't sick. And then a few hours later (when I decided around 11:00 that I really, really wanted a cookie and walked all the way to the cafeteria to get one) I started getting a sore throat...which turned into a horrible sore throat, a cough, a runny nose, a sneezy nose, watery eyes, muscle aches, and general fatigue (on top of my "normal" stomach aches).
Beyond the poor timing, I did have one wise idea. I decided that since the celery in my fridge was getting rather old (and was still unopened...why do I buy food if I'm not going to eat it before it goes bad?), I would add some vegetable to the soup (since last time I was quite upset to realize that there were, in fact, no vegetables whatsoever in my canned chicken noodle soup).
Steps to making this canned soup with fresh(ish) vegetables:
1. Cut off all the bad parts to your celery and throw away any completely bad stalks. This left me with about 1 1/2 stalks...which ended up being enough anyway.


2. Cut the celery into fairly small pieces.
3. Steam the celery or cook it in some way. (I didn't do this step, so I can't really tell you a good way to do it. All I can tell you is the celery ended up a little bit crunchy because it wasn't cooked first).
4. Combine in a microwave-safe bowl your can of vegetable-free chicken noodle soup and your celery. Stir it.
5. Cook in the microwave for about 2-3 minutes, keeping an eye on it to make sure the soup doesn't bubble over and create a mess in the microwave.
6. Stir it once more, to make sure that the heat is properly distributed and the celery is mixed thoroughly and evenly into the soup.
7. Eat, enjoy, and clean up the mess. (And make sure to take out the trash...celery in the process of becoming rotten smells up the room.)

Dorm Food


 Subscribe in a reader