Saturday, October 22, 2016

Oktoberquest - A Questival

Hi guys! It's been a while since I posted. Sorry about that. Here's an update: I'm at UP again! Only not physically at the moment. I'm in the PACE program and have been placed as a teacher in Salt Lake City, Utah.
My roommates and I have decided to participate in an incredible adventure - Oktoberquest. Oktoberquest is a Questival, which is kind of like an adult scavenger hunt. It's such a great way for us to explore this new city that we call home for two years.

Here's a picture of my roommate enjoying her pizza at the festival's kickoff event.


If you wish to support us, download the Cotopaxi judging app, Llama Judge. Search Cotopaxi to find it in the app store. Then, vote for our team, Winston's Angels!

Thanks for all your help guys!

Wednesday, March 19, 2014

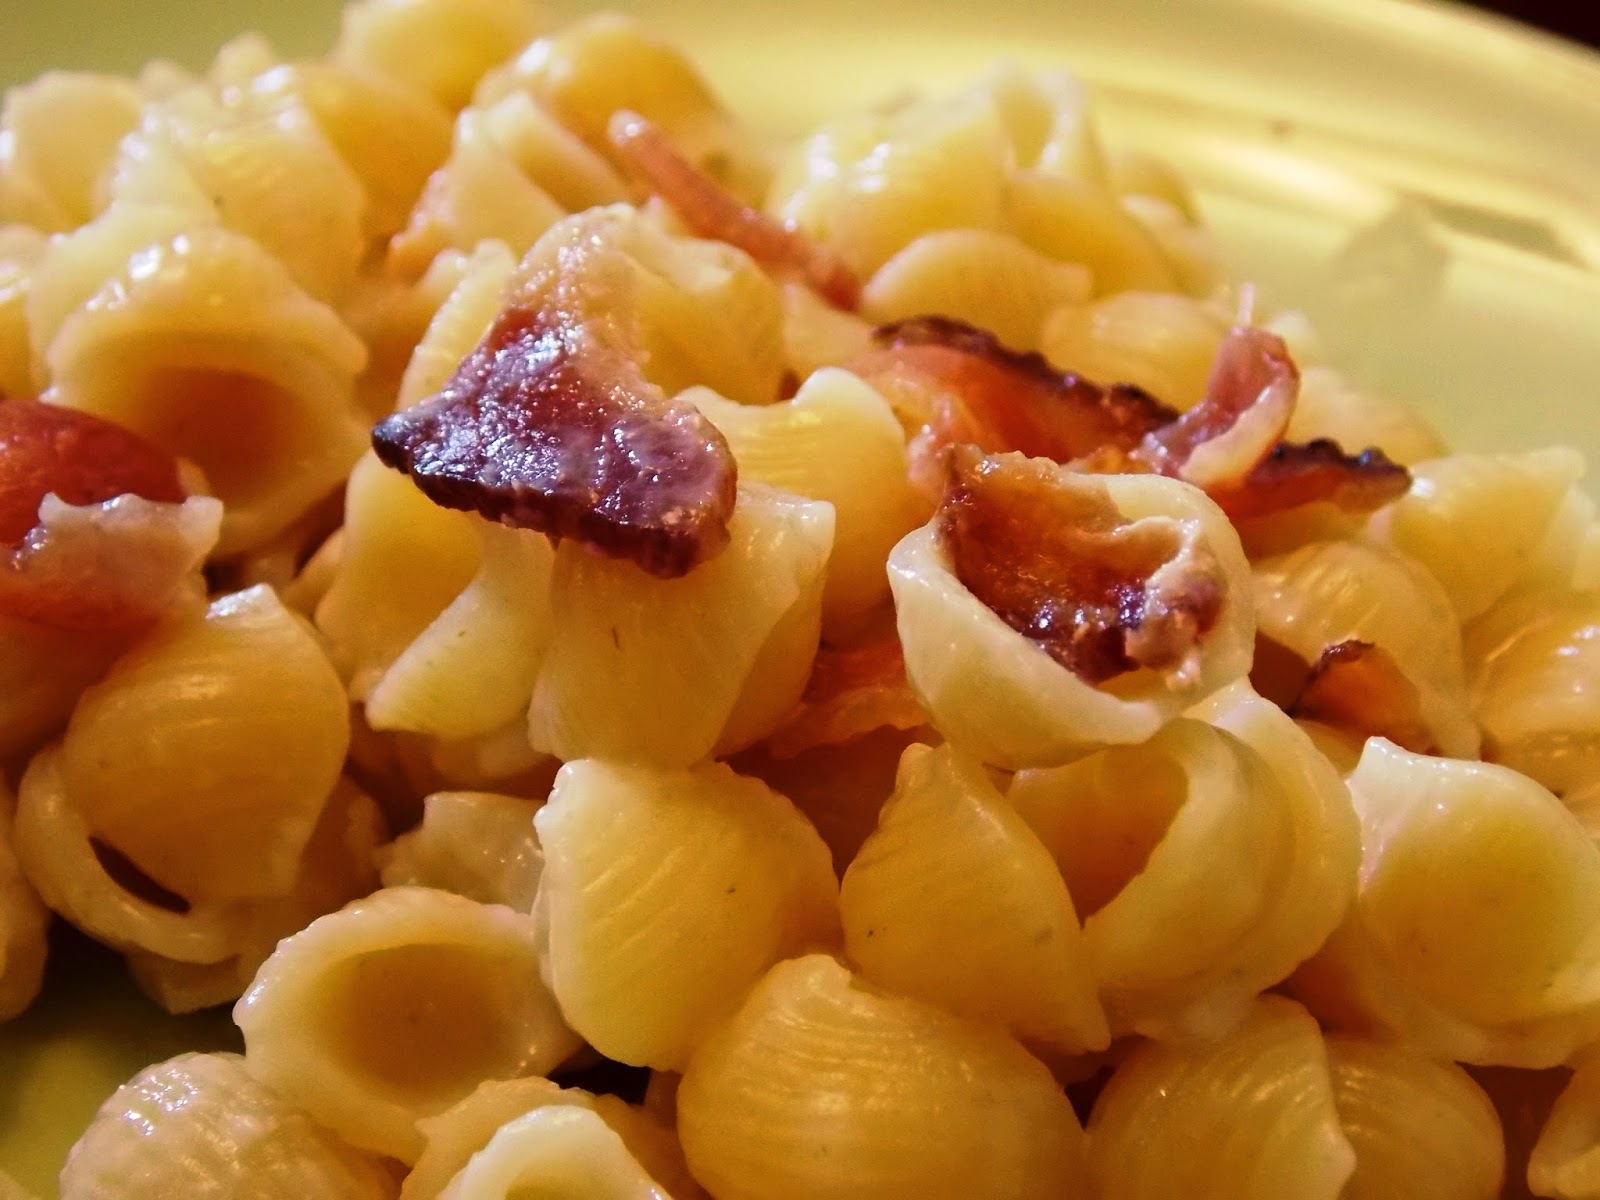
The Cheaters Bacon White Cheddar Pasta


Okay, as a good Catholic school student, I must confess. I cheated on Lent already. One of the few things I gave up was prepackaged foods. I knew going into it that it would be difficult. But I had no idea it would be THIS difficult. No frozen pizzas, no canned soups, no boxed dinners. Anything that was already a meal before it was packaged is now off limits (that means milk and cheese are ok, but a frozen burrito is no bueno). That being said, I think I only barely cheated on this one. I mean, yes, I used a boxed mac and cheese mix, but, I also fried up bacon to crumple into it. I mean, that has to count for something, right? Also, I was starving, it's cold outside, and I just wanted something warm in my stomach. Anyways, I'm still sorry, Lent Gods (or, I guess singular God...also, specifying Lent God is probably not necessary, as I'm pretty sure Lent God is the same as everyday regular God-God).

Ingredients:
1 box Annie's white cheddar shells (or similar, but seriously, I can't get enough of this brand)
6 cups of water
2 Tablespoons low fat butter
1 Tablespoon fat free milk
1 or 2 pieces of bacon


Recipe:
Prepare 1 box of mac and cheese according to the recipe on the back of the box. I prefer to do so with a ratio of 2 Tablespoons of low fat butter and 1 Tablespoon of fat free milk, but the ultimate goal is just to get 3 Tablespoons of something in there, preferably dairy. I even know people who use yogurt.
As you prepare your pasta (probably while you're boiling the water and the noodles), cook 1 or 2 slices of bacon. When grilled, remove from your frying pan onto a place with a piece of paper towel.
Allow bacon to cool slightly. Then, crumple bacon, protecting your fingers by using the paper towel and folding it over so that you make a bacon-paper towel sandwich, then snap bacon repeatedly.
Once your bacon is crumpled, add to your pasta, with cheese mix, milk, and butter. Stir together, then serve. This should be about 2 or 3 servings.
If you chose to save leftovers, reheat in the microwave with a small splash of milk.


Yes, technically, it's still boxed. But at the point that you have dirtied up a pot, strainer, frying pan, spatula, mixing spoon, Tablespoon, plates, and a fork, is it really a prepackaged meal? I mean, I did all the work, right? :P

Saturday, February 8, 2014

Baked Sweet Potato Fries

When my roommate told me how to make these delicious fries, I nearly cried. I loved them so much and I had no idea they were so easy to make. The most difficult part of this entire recipe is actually cutting the sweet potato. So, it's important that you select a sweet potato that's not very firm, and therefore easier to slice. Seriously, once you slice the sweet potato, there's like maybe 30 seconds of work to do. Now, if that's not college food, I don't know what is.

Ingredients:
1 sweet potato (or orange/yellow yam)
1 Tablespoon of olive oil
A dash or two of sea salt or other type of salt

Recipe:
Wash your sweet potato. There's a ton of nutrition and taste in the skin, so you'll need to scrub some of the dirt and germs from the outside, while maintaining the integrity of the skin as much as possible.
Slice your sweet potato into strips in whatever your desired thickness. I prefer thinly sliced fries, but my sister prefers thicker fries. Either way works, it's really up to you. Do note, however, that they will shrivel some while baking.
Preheat your oven to 450 degrees.
In a small or medium mixing bowl, toss your sliced sweet potato with about 1 Tablespoon of olive oil and a dash or so of salt. I prefer sea salt, but it works well with garlic salt or other seasoning salts. Feel free to explore a variety of flavor opportunities.
Allow your fries to sit while you line a baking sheet with aluminum foil or parchment paper. Trust me, you don't want to skip this step because otherwise you risk ruining your baking sheet.
If your fries feel oily, spread them them across the baking sheet. Otherwise, sprinkle just a bit more olive oil to the sheet before putting the fries on.
Bake for about 10 to 20 minutes, flipping every 5 minutes. How long you bake your fries also depends on your personal preference. Bake for less time if you prefer softer fries. Bake for longer if you prefer crispier fries.
When your fries are to your personal preference, remove them and let cool for about 5 minutes before serving. These taste great on their own, with honey mustard, ketchup, or barbecue sauce.


These fries are oh so tasty. And the best part is, they're actually pretty good for you. Not only are they baked instead of deep fried like traditional fries, but sweet potatoes and olive oil are actually packed full of good nutrients for your skin and hair. This is a delicious alternative to your standard deep fried potato fries.

Saturday, February 1, 2014

3 Ingredient Apple Berry Muffins

Ok, ok, I know. Using a mix as an ingredient is kind of cheating. If you're offended by that, I'm sorry, but this is not the blog for you. But, you know what, I'm not sorry. You can make this for under 25 cents per muffin. That, my friends, isn't cheating. It's just plain street smarts.


You might notice the nifty silicon baking cups I used to make these. My incredible cousin got me these for Christmas and this was my first time baking with them. I must say, they are incredible. They're safe to put in the dishwasher, and they're SUPER cute. I still haven't decided if you're supposed to take your muffins or cupcakes out of the baking cups before serving them. The muffins popped right out, so I suppose that's by design? If anyone knows, please comment to let me know.
I chose to do blue and green colors today because of this little thing called the Super Bowl (you might have heard something about the Seahawks playing?). I'm a wee bit excited, even though I don't even have a TV to watch the game on. I'm lame, I know. So, in celebration of my team making it to the Super Bowl, these muffins include Seahawk colors and Washington state apples. The berries probably come from California, but whatever. As long as they didn't come from Colorado, I suppose I'm ok.

Ingredients:
1 Mini Package of Betty Crocker Triple Berry Muffin Mix (makes 6 muffins)
1/4 Apple (I recommend Fuji or Honey Crisp)
1/8 teaspoon of Baking Soda
1/2 Cup Water

Recipe:
Preheat the oven to 400 degrees (375 if using dark or non-stick pans, including these silicon cups).
Cut and core an apple, then use 1/4 of the apple (about 2 slices). Roughly cut off the skins (no need for precision here). Then dice or cube, depending on how large you want the pieces of apples to be.
In a medium-sized bowl, mix together muffin mix, apple, baking soda, and water. Let sit while the oven preheats. The baking soda should neutralize the acid in the apple twice, once when combined and sitting, then once when it is heated in the oven. Baking is a science, yo!
Once the oven has heated, spoon mix evenly into 6 baking cups (paper or silicon). Then place in the oven for 16-20 minutes, until the top is golden brown and a toothpick inserted in the center comes out cleanly.
Allow them to cool, then serve and enjoy.


These were delicious muffins. And the perfect amount for a college student or single bachelor. No waste here. And now you'll have a few days worth of on-the-go breakfasts, snacks, or healthy treats.

Sunday, January 26, 2014

College Monte Cristo

I always find myself throwing away the heels to my bread, which is ridiculously wasteful. The way I think of it, I probably waste about a loaf or two every year, simply because I don't eat the heels. But, I mean, it's not my fault the heel is so gross. So what is a girl supposed to do? Well, now I've got an answer. This solution stems very, very loosely from a recipe by Closet Cooking. And, all of my ingredients were purchased on sale, which is always a plus. The ham, for example, was on sale for $5 a pound at the deli department, where I was able to request a thicker cut than standard deli meat. I should specify that this recipe doesn't need to be made with the heels of bread, but rather can be. But, I mean, you have 2 heels that you're going to throw away anyway, why not use them?


Ingredients:
1 egg
A splash of milk (1/8 of a cup to 1/4 cup)
2 heels of bread (I used sourdough bread)
1 slice of thick cut ham (or a serving of thin sliced ham)
1 1/2 pieces of Colby Jack cheese
1 Tablespoon of butter

Recipe:
Prepare sandwich with 2 heels of bread, a slice and a half of cheese, and ham.
Whisk together the egg and milk in a bowl wide enough for a piece of bread.
Warm a frying pan over medium heat with 1 Tablespoon of butter.
As the frying pan heats, dip the sandwich in the egg-milk mix. Then flip it over and dip the other side, much like with french toast.
Next, grill the sandwich, much like a grilled cheese sandwich. The sandwich is ready when both sides of the bread are slightly crispy, and the cheese has melted. Remove from the heat and cut in half.
With the left over egg-milk mixture, you might combine with salt, pepper, or other seasoning and make milky scrambled eggs as a side dish. 


This sandwich is delicious and uses a lot of ingredients that you already have in your in your kitchen. I think this will be my new way of using up the heels of bread. Try it. It just might be yours too!

Thursday, January 16, 2014

Seafood Alfredo

I found a GREAT deal the other day: a mix of fresh seafood for only $1.50! The mix contained squid, cuttlefish tentacle, shrimped, mussels, and, unfortunately, imitation crab. I eventually just took out the imitation crab. I had no idea it was possible to get so much seafood for so cheap. It was enough for about 3 or 4 servings. I would highly recommend purchasing a seafood mix like this, but making sure it has very little imitation crab (so that you can throw it away without guilt).

Ingredients:
1 Mix of Seafood (I picked mine up at the Safeway meat and seafood department)
1 jar of Alfredo sauce
About 1/3 of a box of noodles (I prefer shell noodles with this sort of dish)
1-2 Tablespoons of butter

Recipe:
First, cook your seafood in a frying pan with butter, over a medium low heat. Look at how tasty it is.


As you heat your seafood, boil the water for your pasta. If all is timed well, the you should be adding your noodles to the water at the same time as you begin mixing together your sauce.
Once the seafood is cooked, strain the butter and combine with a jar of Alfredo sauce. Then heat over a medium heat, stirring often. You may add garlic salt, Italian seasoning, or any other flavor you might desire.
When the noodles are tender, strain them. Then serve and enjoy.


This was a delicious way to begin the semester. I made this once, then took the leftovers and stretched it out over a couple of very busy days. It could be better improved by adding a second jar of sauce (I prefer to combine 1 jar of light Alfredo sauce with 1 jar of regular Alfredo). There was definitely enough seafood to double the sauce.
I am very much looking forward to another great semester full of terrific food and fantastic courses. Of course, I'm sure in a couple weeks when I'm taking exams and writing papers, I'll have a completely different opinion of this semester. Until then, though, I am thrilled to be back.

Sunday, December 1, 2013

And the Winning Pie is...

BOTH OF THEM!

It was requested that I just go ahead and make both pies for Thanksgiving. And, although it required carrying about 10 pounds of pie in one arm, and a suitcase in the other, 1 mile to the bus, on the bus, and on the train all the way home, I think it was worth it. Everybody loved these pies.

Here are some pictures of the pies. I made them according to the recipes I previously posted (Blackberry Apple Pie and Caramel Apple Pie). Following the recipe I posted earlier (which includes more flower than I originally used), the slices of pie came out cleanly and the filling wasn't like soup. These two recipes are definitely ones to follow in the future.

 Berry Apple Pie

The berry apple pie featured the same pie crust as I used with my Triple Berry Pie. The design, however, was slightly different. This design featured an autumn tree with autumn leaf designs on the tree and on the edge of the crust. I used these cookie cutters for both of these pies.


Caramel Apple Pie

Using the same pie crust recipe, I created a latticed top on this pie. I used leaf shaped dough on the lattice, and created a pattern using apple shapes and acorn shapes on the edge of the pie.


It was a fabulous Thanksgiving. These pies were a delicious ending to an incredible feast. Everyone won with these pies.