Showing posts with label successful recipe. Show all posts

Tuesday, June 19, 2012

Candy Graduation Caps

My sister graduated from high school the other day! But this recipe can be used for any type of graduation. High school, college, preschool, what have you. Our high school colors were blue and silver (they were navy blue and cyan when I was a freshman, though, so I like to say that our colors are blue and blue), but this can be done with any school color. In a few years, I see myself making this with purple (the color for University of Portland).
Making these candies is a lot simpler than it looks. It does, however, require two shopping trips: one trip to any craft supplies store, and one to your regular grocery store.

Ingredients:
12 chilled but not frozen Reese's Cups
12 chocolate squares
12 M&M's of your school's color
1 colored licorice rope of your school's color
12 candy sticks (the kind used for lollipops)
Candy Melts (chocolate is probably the best idea. I used Vanilla, but mistakes show very easily with this one).

Recipe:
First, cut the colored licorice into about two inch sections. Then, either pull the licorice apart or cut it apart so that you have a thin two inch rope, which will look like a tassel.
Next, melt the candy melts. Follow the instructions on the package, but generally this is done by melting in the microwave, on defrost or half power. You won't need the whole package. Just a handful should do. If the candy melts harden while you're working, just microwave it again. That's the best part. You can always go back and reuse. It's not really that time sensitive.
While you melt the candy melts, unwrap your chocolates and Reese's cups.
Once you've done that, take one candy stick and dip the end into the melted candy melts. Take this end and insert it into an upside down Reese's cup.
After the candy melt has hardened so that the sticks are firm in the cups, coat the top of your Reese's cup with melted candy melts and place a chocolate square on top. Let this harden, too, so that it looks like a graduation cap and is firm in its shape.
Next, stick the "tassel" (licorice rope) on the top using melted candy melts as glue. I used the tip of a sharp knife as my paint brush. Be sure to make the line as thin as possible (or even better, paint half of the licorice rope and then place it firmly on the top of the cap.
Then, paint the "M" half of the M&M with melted candy melts. Place this in the center of the top of your cap.
And now you're done. You have candy graduation caps that, once the candy melts have hardened, will stay together and be enjoyed by all your graduation party guests. Do be sure to clean up your mess as quickly as possible. If your candy melts have hardened in your mug, melt them again before you clean, which will make it significantly easier to clean.


These candies were a hit at my sister's graduation party. They'll be a hit at yours too. They're a lot more personal than candies you might find at the grocery store, but a lot easier than other graduation-themed treats that you might make for your party. I found a similar candy on Pinterest but it didn't come with a recipe. So, I used ideas from this How To. There are several different ways to make this candy, but this is, by far, the easiest. And it can be done in a dorm kitchen. All you need is a mug and a microwave, as well as all the ingredients.
Happy graduation to all the graduates out there!


Tuesday, June 12, 2012

Scat on a Log

I don't remember who in my family decided to name this snack. It was probably my sister. Anyway, Scat on a Log doesn't actually taste like scat. Or logs. But it does kind of look like scat on a snowy log, I guess. Based on Ants on a Log (or Bran on a Log like I made back in August), Scat on a Log is simple to make.

You will need:
Celery
Cream Cheese
Sliced Black Olives

First, wash your celery. You may want to rinse the black olives, too, since canned olives tend to have unnecessary salt added to them.
Then, cut the celery into lengths about the length of your index finger.
Next, spread cream cheese along the pieces of celery. Place slices of olives firmly in the cream cheese, along the length of each piece of celery.
Finally, eat, enjoy, and clean up the mess. The cream cheese will start to smell if you leave your dishes unwashed for too long.


This tasted pretty good. The cream cheese is rich, the olives are salty, and the celery is healthy. What's not to love with this snack?


Tuesday, June 5, 2012

Topped Ramen: Number 3

In the last Topped Ramen post, I tried the Oriental Flavor Top Ramen. I didn't really like the flavor. However, I had another package of the flavor leftover. So, I decided to try something new: making Ramen without the flavor packet. Essentially, this Topped Ramen involves Ramen stir fry.

To make this, I first chopped vegetables. I used baby carrots and regular celery, slicing in 1/4 inch pieces.
While I chopped the vegetables, I soaked the ramen noodles in boiling water.
After all the veggies were chopped and the ramen was soft, I mixed them with two tablespoons of teriyaki sauce. Then, I let it sit in the fridge for a couple of hours.
After a couple hours, I put the mixture onto a hot frying pan with just enough oil to keep it from sticking. I stirred constantly while it cooked, until the noodles darkened.
Finally, I put I ate, enjoyed, and cleaned up the mess.

It ended up tasting really good this way. I'd never made stir fry before, and I have a lot to learn, but for an experiment, this recipe turned out pretty well. I would recommend trying this recipe. The only change I might make to it is possibly steaming the veggies first, as the carrots, especially, were a bit too crunchy.


Dorm Food

 Subscribe in a reader

Wednesday, February 8, 2012

Knock You Naked Brownies

I didn't name these. Or invent them. Or do very much in making them. But I did eat one (but no, I did not get naked for these).
Seriously, though....my friends were making brownies Friday afternoon, and I thought I would join them because, well, brownies. And also friends. And, most importantly, one of them happens to be a really great baker...like an AMAZING baker. She was the one who found the recipe by The Pioneer Woman.
The recipe was altered, slightly, but tasted delicious anyway.

Ingredients:
Chocolate Cake Mix
Evaporated milk (2/3 cup and 1/2 cup)
1/2 cup of melted butter
30 Riesen caramels (unwrapped)

Recipe:
First, preheat the oven to 350 degrees.
Then, mix together cake mix, 1/3 cup evaporated milk, and melted butter. Stir, stir, stir!
Divide the mixture in half and press half of it into a square baking pan (make sure to grease it pretty well). Be sure to make edges with the dough, so that when you add the caramel, it won't leak.
Next, bake it for about 8 to 10 minutes.
Then, melt the Riesen caramels with 1/2 cup evaporated milk (you're supposed t do this in a double boiler, but it worked just melting it in a pot over the stove). Stir constantly, in effort to avoid burning any of it.
Next, pour this sauce over the cooked brownie in the baking pan.
Then, take the second (unbaked) half of the brownie dough and shape it into a large square about the size of (or a little smaller than) the pan. Then, find a way to get this on top of the caramel and brownie in the pan, without causing the hot caramel to splash. Good luck!
Now, bake for 20 to 25 minutes. Allow it to cool to room temperature. Then cut it, cover it and refrigerate for several hours.
Then, finally, you're done. You have some delicious brownies. Like, seriously, amazing brownies. SOOOOO good. You'd be crazy not to try these.

What else would you be crazy not to try that my dear friend Sarah has shown me? Inbox Dollars. It's great for anyone who checks their e-mail everyday...like me. I just got an account and I totally recommend you to do the same. In fact, just for making an account, you'll get $5! (And for every dollar that you make, they will send me an additional 10 cents...just a little perk that I'll be getting from this). Check it out, if you want. If not, I won't be offended. But do try the brownies...that's a necessity.

Dorm Food

 Subscribe in a reader

Saturday, February 4, 2012

Salted Caramel Hot Chocolate

So, I have this favorite drink at Starbucks. But it's a seasonal drink, and one that is not offered at the Starbucks-brand coffee stands on campus. This makes me a really sad panda. That is, it did until I came up with a brilliant idea today. I can hack my way towards a Starbucks salted caramel hot chocolate. It's really easy and I'm not sure why I didn't think of it before.
Step 1: Order a caramel hot chocolate. On its own, this is nothing special. I really actually hate normal caramel hot chocolate.
Step 2: Add salt. Not just any salt will do. It's got to be coarse sea salt. Which my cafeteria happens to have in the spice section by the taco station. I didn't add to much (about half a spoon full for my 12 oz hot chocolate).
Step 3: Stir like no other. This way, there won't be any suddenly super salty bits in the drink. Also, since they tend to make everything at our coffee stands super foamy, this will help get rid of some of the foam so that by the time I made it back to my room, there wasn't any foam at all (which usually isn't true unless I stir it first).
And that's it.
Delicious slated caramel hot chocolate just like Starbucks, that I hardly had to work for. I'm going to be doing this from now on.


Dorm Food

 Subscribe in a reader

Sunday, December 25, 2011

Cute Christmas Cookies

One post with two recipes? Yup, that's what this is. It's Christmas time, which means time for lots and lots and lots of cookies. Last year I made over 500 cookies in just the week of Christmas. This year I didn't make quite that many, but I still made plenty enough to share with you.


Cookie Number One: Sugar Cookies
The first recipe is for sugar cookies. I borrowed this recipe from Our Best Bites, and man they were delicious. My mom and I attempted to make icing but somehow ruined it, so the cookies remained plain and undecorated but even so the sugar cookies tasted quite delicious. I'm so grateful to have found this wonderful recipe. I shall never use another sugar cookie recipe again...especially since it only had an hour of chilling time, compared to the couple hours needed for my other standby recipe.

Ingredients:
1 cup of real butter (2 sticks)
1 cup of sugar
1 egg
1 1/2 teaspoons of vanilla extract (or almond, though I used all of my almond up making macaroons the other day)
3 cups of flour
1 1/2 teaspoons of baking powder
1/2 teaspoon of salt

First cream the softened butter and sugar together for about 2 minutes, using an electric mixer.
Next, add the egg and extract and mix thoroughly.
In a separate bowl, mix the flour, baking powder, and salt together.
Slowly add the flour mixture to the butter mixture and mix thoroughly. It will end up tasting so delicious...but unless you're doubling the recipe, try your best to avoid eating all the dough.
Now, cover the bowl with press and seal wrap or similar plastic covering. Then place it in the fridge to chill for an hour. (There's another trick for this step, but I didn't get a chance to try it that way).
When it's chilled, take the dough out of the fridge. If the dough is too crumbly, you probably measured something incorrectly but you can fix it by adding a bit of water. Don't add too much, though.
Now, roll it on a floured surface (using a rolling pin that has also been floured). Make shapes using cookie cutters and place them on greased cookie sheets.
Finally, bake for about 8 minutes at 350 degrees.


These ended up tasting so delicious. I will save this recipe and use it every time I need to make cookies. mmmmmm

Cookie Number 2: Peanut Butter Cookies
The second type of cookie is peanut butter cookies. I saw the design idea on Pinterest (which is a wonderful site if you haven't already visited it). I must be honest, I cheated. I used a pre-made package by Betty Crocker. But, for these cookies the point was to make them very cute. Which, if I do say so myself, I did manage to do.
To make these cookies, I first followed the instructions on the package. Before baking, I flattened them using a fork to make a crisscross pattern, then used my washed fingers to smooth the surface.
When they came out of the oven, I decorated them with cold candies. Half of them were thumbprint cookies using chocolate kisses.
The other half were reindeer cookies. Chocolate covered pretzels made perfect antlers, and M&Ms made the eyes and noses. They have to be refrigerated or frozen first to keep them from melting. This part is very important so don't forget...melted chocolate makes a terrible mess, so don't let it happen to you. You may, also, want to put the cookies in the fridge after you decorate them, in effort to help the candies set in the cookies.


These cookies ended up so adorable. I got several compliments for them. And they were super easy to make, to boot. These could easily be made in a dorm, assuming you have an oven. They're so cute and easy, I can't believe I haven't done it before.


Dorm Food

 Subscribe in a reader

Wednesday, November 9, 2011

Grilled Salami and Mozzarella Sandwiches


I finally got my own frying pan, which means no more borrowing from my roommate. I'm super in love with it because it's super cute (and cost less than a normal one). It's already been broken in (and I will post what I made the first time, after I make it again since I forgot to take photos), but I decided to use my money's worth out of it the other day when I was making myself lunch. So, I decided to make a grilled sandwich. Though I could have done a normal grilled cheese or used some other meat (since I also have ham in my fridge), I decided to be super creative with my sandwich. Thus, a grilled salami and mozzarella sandwich.
To make the sandwich, you will need bread of any kind (I used Franz multi grain because that's what sold at my school and that's also my favorite bread company), salami (mine was Lite salami, but any kind works so long as it is thinly sliced), 1 1/2 string cheese sticks (you can eat the other half if you want), some sort of cooking spray or butter (I used canola oil, since it was cheapest), a frying pan, and a spatula. You might also want some lettuce or mixed greens, mayo, or mustard.
First, place 6 pieces of salami along one piece of brea so that there are no gaps between the pieces (you may need more or less depending on how large your salami pieces are and how large your bread is).
Then, slice your mozzarella string cheese sticks so that they are round disks. Place these disks in even rows across your sandwich.


Heat your frying pan over a low to medium heat, with either butter or oil on the frying pan as it heats.
Then, place your bread with its toppings onto the heated frying pan, and place another piece of bread over this, so that it is now a sandwich.


Heat until golden brown and flip. Use extra caution while flipping because it is likely that your cheese will slide off. If this happens, take off the heat immediately and reorganize your sandwich.


Heat the other side until it, too, is golden brown. Then remove the frying pan from heat and place your sandwich on a plate.
From here, you can do as you please. You can add mustard, mayo, lettuce, whatever you want. I added mixed spring greens and spinach, which gave made it nice and earthy. But you can do whatever you feel like doing. Note that the mozzarella is likely not melted. Again (as I've said in previous posts), mozzarella cheese doesn't really like to melt. But do not fret over this. Your sandwich is still warm and your bread is crispy.
 I'm really fond of this sandwich. It was super delicious and took only slightly longer than a normal grilled cheese takes to make. I especially liked how earthy it tasted and looked. After reading so many blog posts from other people about pumpkin and squash recipes, I've been in a very earthy mood lately, so having this sandwich was a nice continuation of that mood. I HIGHLY SUGGEST YOU TRY THIS RECIPE!

Dorm Food


 Subscribe in a reader

Tuesday, November 8, 2011

White Chocolate Pretzels and Raspberries


Do you ever feel like eating a snack, but you just can't decide what snack to eat? Do I want something salty? Something sugary? Something tart? The other day I wanted all three of these, so I created a new snack. Yes, I know it's not a real recipe, but it was a unique combination of foods that any dorm-bound student can keep in their room (especially if they have a fridge).
The idea is simple: place a raspberry on top of a white chocolate covered pretzel.
Eat it,
Enjoy it,
And that's it. There's virtually no mess to these snacks. But man, oh man, are they delicious. And they look pretty fancy as well.

Here's some pictures I took while I was creating this delicious (and beautiful) snack:


Dorm Food

 Subscribe in a reader

Monday, October 31, 2011

Edible Jack O'Lantern


Happy Halloween everybody! In celebration of this wonderful holiday, I have created a non-traditional jack o'lantern. You see, us college folks aren't allowed to have the large knives required to carve a pumpkin. And we aren't allowed to light the candle inside the pumpkin. And we don't have a front porch to place them on. So, instead, I made this. It was fairly simple, quite delicious, and close to nutritious. So here's how it works:
First, toast a piece of bread. It doesn't necessarily have to be completely toasted (in fact, I personally prefer it that way), but it needs to be warm and fairly solid (you'll be cutting it into a pumpkin shape later...or now, if you find that easier...which you probably will).
Then, spread a very generous amount of Nutella on your piece of toast. Come on, it's Halloween, you're allowed to get a little out of control.

It'll end up looking like this (except not sideways...I have no idea why my photos sometimes turn sideways when they're being uploaded. I took this picture portrait style. There's no reason it should look like that, and it doesn't when I look at the actual file. hmmmm....maybe there's a phantom haunting my computer....Anyway,)
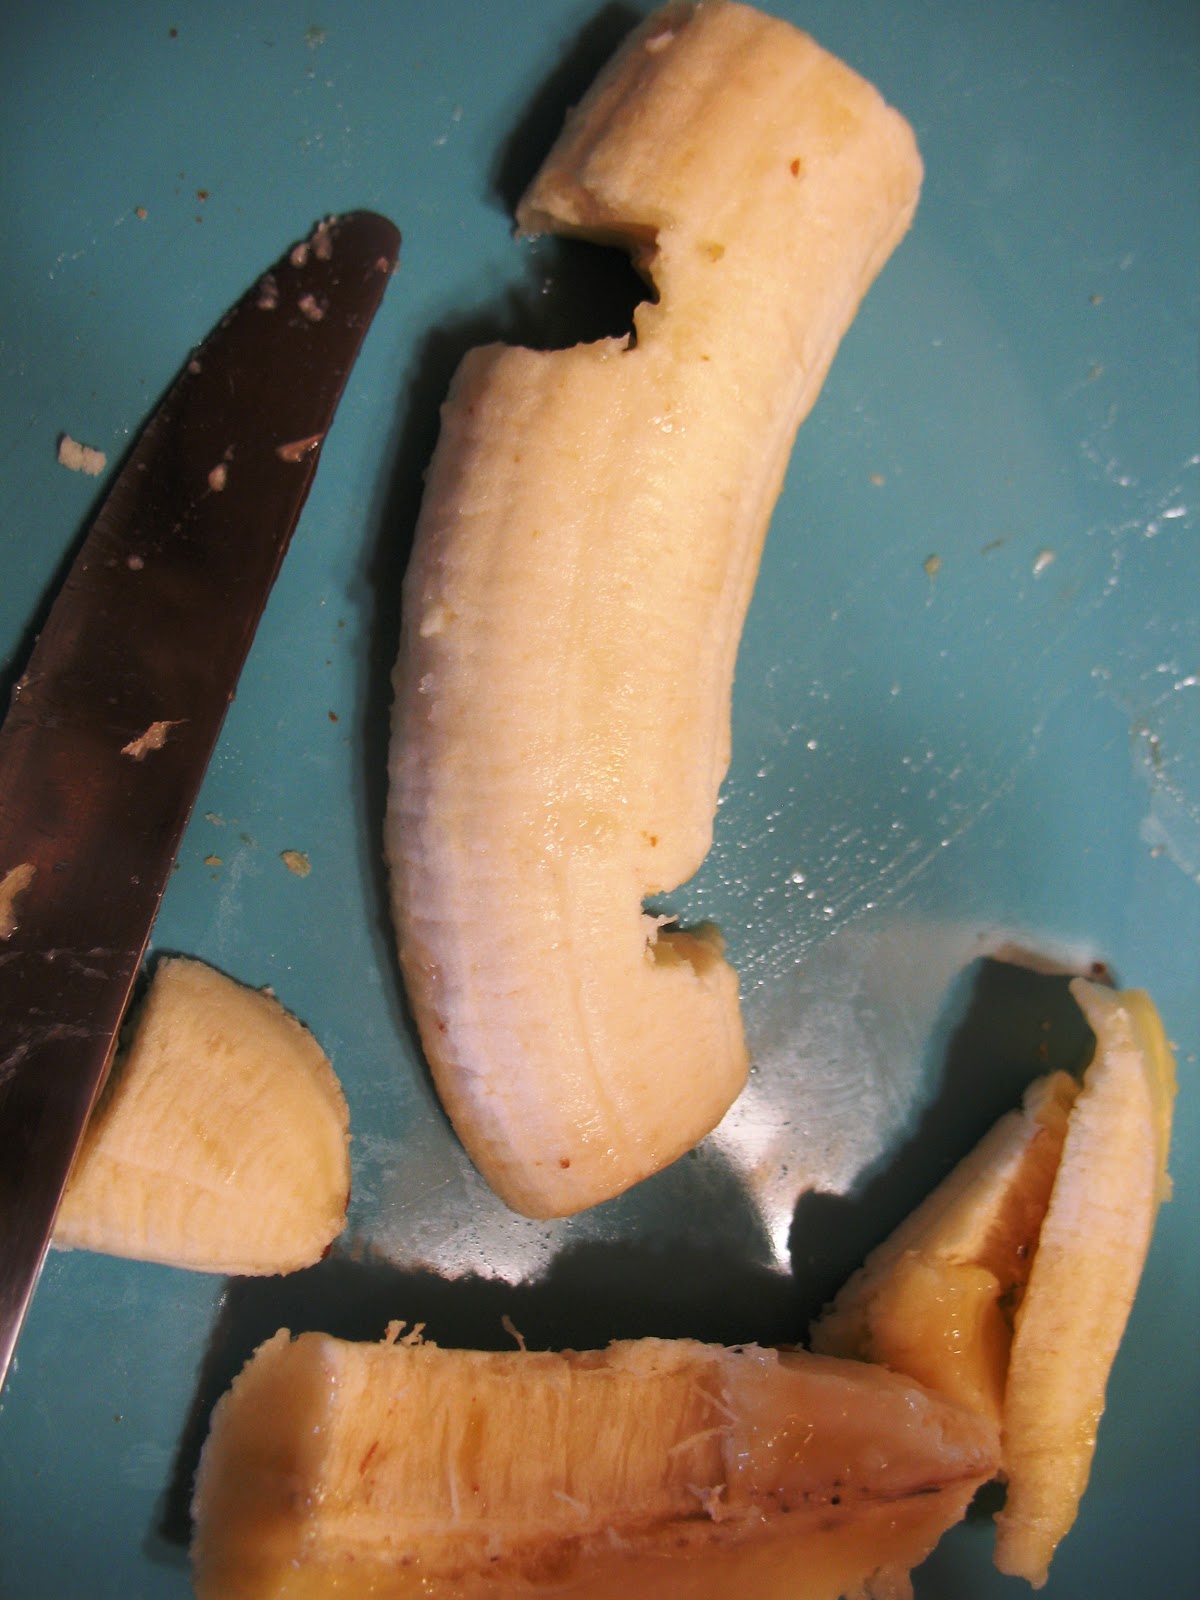
Next comes the fun part. Making the face. Take a banana and cut it in half length-ways. Then, cut out the curviest part of the banana and use this as the mouth. Cut out pieces to make missing teeth.

(Again, I have no idea why it appears vertically on here. The file itself is not like that. grrrrr...). Be sure to keep the stem of your banana. Now, place this on your piece of toast where you think the mouth should go. (If you haven't already cut your toast into a pumpkin-shape, make sure to keep some room so you can do this later).
Next comes the eyes. You can use whatever you want/have available for this part. I thought of using cheerios because I happen to have some, but ultimately decided on raspberries because I want to use them before they go bad. I loved how the raspberries turned out, though. It made my jack o'lantern look blood thirsty. To make eyes like mine, using raspberries, first clean your raspberry (you should only need one). Then, slice off the bottom tip. Then, slice the remaining piece in half so that you have two rings.


Now, place these on your jack o'lantern where you think the eyes should go.
For the nose, I used an oddly-shaped banana chip. But you can use whatever nose-shaped food you have lying around. Place this where you think the nose should go.
Next, cut the toast into a pumpkin shape, being careful not to cut the mouth or eyes. (if you haven't done so already).
Finally, use the step of your banana from earlier and place it at the top, so that it acts as the "pumpkin stem".
And, voila: an edible jack o'lantern.

Feel free to eat the scraps as you go (that way you are able to have all the nutrition and deliciousness of a full banana....plus, you paid for this food, why would you want to waste any of it?). And be sure to eat, enjoy, and clean up the mess. Because if you used two plates like I did, there's definitely going to be a mess. And messes like this could be the scariest part of your Halloween.

Dorm Food

 Subscribe in a reader

Sunday, October 30, 2011

Halloween Cereal


In honor of tomorrow's holiday, I thought I would share my favorite Halloween-related meal: breakfast. Specifically, I thought I should tell you about my favorite Halloween cereal. Every year, General Mills comes out with a line of Monster Cereals, including Count Chocula, Fraken Berry, and Boo Berry (apparently they used to have others as well, but these were discontinued before I was born). Of these, my absolute favorite is Boo Berry. Now, this is odd to me because I typically cannot stand blueberries. But for this, my taste buds make an exception.
Boo Berry Cereal is similar to Lucky Charms in that it is corn cereal with marshmallows. However, unlike Lucky Charms, the cereal doesn't taste like cardboard (though I personally don't mind the cereal-part of Lucky Charms, most people I know can't stand it). Instead, the corn cereal is blueberry flavored (thus the name "Boo Berry").
Boo Berry Cereal is, perhaps, one of my favorite things about Halloween. So, when I saw it was on sale when I was grocery shopping yesterday, I went for it. Don't worry, everything else I got was healthy, so this purchase was totally ok (alright, fine, I did buy a couple bags of candy...and white chocolate covered pretzels...and Cow Pal's cheese and bread sticks...so maybe I didn't buy only healthy things...but I did buy healthy food too, I swear!).
Actually, Boo Berry Cereal is surprisingly not all that bad for you. Comparing it to my other cereal purchase yesterday (Raisin Bran), it has fewer calories, less fat, and about the same or slightly more of nearly every vitamin and mineral on the box (with the exception of iron, since Raisin Bran boasts an impossible to beat 60% of your daily amount of iron). It's still not necessarily good for you, but it's not as unhealthy as you might assume, especially when comparing it to what you would assume to be "healthy" cereal.
Still, the reason I like Boo Berry cereal so much is not it's healthiness or unhealthiness. I like its silliness. The marshmallows and blueberry-flavored cereal are all in the shape of ghosts (with a very strange resemblance of the Pac Man ghosts). And they taste good, which is always a good benefit for food to have.


Dorm Food

 Subscribe in a reader

Saturday, October 29, 2011

How to Make Easy Mac (taste good)

So, this blog has kind of turned into more of a personal blog than a food blog, which is partially because I keep getting food from the cafeteria, rather than making it myself. So, I'm going to try to get back to the old style of things by making my own food as often as possible again (and using my food points to get ingredients at the cafeteria instead of full meals, as often as possible). Today's recipe: Easy Mac.


I tried eating Easy Mac by following the instructions and anyone who's had it before can tell you, it's quite disgusting. It tastes nothing like normal craft mac n' cheese (possibly because it contains none of the same ingredients). So, I did a little research online and found some helpful hints on making Easy Mac edible (Yahoo Answers). A compilation of everything I found that actually sounded edible, turned into this:
First, soak the noodles in warm water (however warm you can get your tap water to become) for about 2 minutes. This will slightly soften the noodles, but most importantly get all the milk powder and other disgusting stuff off the noodles.Be sure to fill the water up to the "Fill to Here" line, to ensure that all the noodles are being properly soaked.


Next, strain the noodles. This is where the strainer I picked up (in Why I Should Pay Attention to Warning Signs) comes in handy.
Then, fill the cup to just below the "Fill to Here" line using ACTUAL MILK (which can be picked up from your cafeteria, if you don't happen to have milk in your fridge).


From here on, comes the hard part. Unfortunately, in order to make Easy Mac taste good, it no longer gets to be easy. However, it's still a single serving of mac n' cheese that you can make on your own (which is the important part anyway).
Microwave the cup for about 30 seconds. Then stir.
Then another 30 seconds. And stir.
Another 30 seconds. Stir.
And yet again, 30 seconds. Stir.
Continue this until the noodles are soft enough to your taste. *NOTE: the milk will eventually start to bubble over. For this reason, try to let it cool completely between each round of microwaving, microwave for no more than 30 seconds at a time, and keep LOTS of paper towels handy. Also, be sure to watch it carefully. Once it starts bubbling over, take it out and clean up the mess immediately. Let it cool completely as you clean the mess because you'll probably need to put it back in for at least another 15 seconds after this point. Try to limit how much you let it boil over, though, because you do want to keep as much of the milk as possible.
Once the noodles are soft enough to your liking, immediately add all of the cheese packet, and stir completely so that there are absolutely no chunks of cheese powder (these taste disgusting, so avoid them like the plague).
Allow it to cool and let stand until it is thickened.
Then, eat, enjoy, and clean up the mess. Luckily, there's no bowl to clean up after this. Unluckily, the microwave will need to be washed thoroughly after you are done with it (I recommend doing this while you let it cool).
The final product should look something like this:


Easy Mac is still not the tastiest of mac n' cheese, but by following this preparation process, it is at least edible. Using the ones that come in cool shapes (mine were SpongeBob) makes your taste buds 10X happier. After all, ma n' cheese is a children's dish, so being a little silly with it is completely acceptable.
For more tips on how to make Easy Mac taste better, I recommend checking out the Yahoo Answers page I cited earlier, as well as this post by JPDsmiley.

Dorm Food

 Subscribe in a reader

Friday, September 30, 2011

Des Crêpes du Nutella


J'adore des crêpe et j'adore le nutella. Donc, j'ai partagé avec ma classe de la parole. Avant-hier, j'ai cuisiné avec mon ami. Et nous avons fait beaucoup de crêpes. Désolé. J'ai tendance parler français quand je fais des crêpes....I love crepes and I love nutella. So, I shared with my speech class. The day before yesterday, I cooked with my friend. And we made lots of crepes. Sorry, I have a tendency to speak French when I make crepes.So, yeah, that's what I did Wednesday night after workshop (which ends at 8:10 at night). I ended up staying in the kitchen until about midnight. YAY!But...I made crepes. Which is just so much fun to do because they aren't always successful, but they're almost always delicious.And I'm pretty sure everyone in my class loved them (I was giving a tribute speech to nutella...yeah, I'm a freak). But anyway, here's how to make crepes. They aren't necessarily dorm friendly by any means, but I made it work. Also, the recipe makes about 20 crepes, so this is something to do when you want to make friends.

You will need:


A frying pan
Pam or other spray oil, or butter if you so choose
6 eggs

1/4 Stick of Butter2 cups of flour
Sugar (the original recipe calls for 2 tsp of sugar in 20 crepes, but I probably used more like 4-8 tablespoons...anywhere between these to limits will work)
Salt (about 8 dashes worth...real specific, huh?...this is probably about 1/2 tsp of salt)
4 cups of milk (or 4 of the things of milk they sell at the cafeteria...they're the same amount)


Nutella
KnifeForks (for mixing ingredients, though a wisk would be best if you have one)
Mixing bowl (I used 4 cereal bowls...which is a bad idea)
Spatula (unless you're one of those cool kids who can flip crepes in the air, in which case I hate you)
Recipe:
First, beat the eggs. This is pretty much the same thing as scrambling, if being done with a fork. Just stir it until the eggs are all one color.
Then, add the milk. Again, mix it until it's all one color.
Next, add the dry ingredients. Stir in the flour and add salt and sugar. It's gonna be a bit lumpy. That's only temporarily ok.
While you do this, melt your butter. Stir this into the batter. Seriously stir. Then stir some more. Keep stirring until it is all uniform. Stop for a moment. If anything at any point floats to the top of the batter, mix some more. Make sure there's no flour on the edges either. Really, it should be super thin and uniform.
Once this has finally occurred, heat up your frying pan (which should be greased) on a low to medium, but more like low, heat. As it heats, stir the batter even more. Really, this is an important step.
Put about 2 tbsp of batter into the pan and move the pan in a circular shape so that the bottom is covered entirely with a very thin layer of batter.
When the edges are golden brown, flip the crepe. Then, after about a 45 seconds, check the other side to see if it's done. Both sides should (hopefully) be golden brown. If it's too white, just continue to fry the crepe. Then, put it on a plate.


Repeat this about 4 times (putting something like paper towel between each crepe you put on the plate). Then, regrease the pan.
Do this whole process about 5 times.
And by this point you've wasted several hours and have a rather large stack of crepes.


Pez eyeing the crepes.

Now, you can spread the nutella on them. You can use other things to fill your crepes too (like apple pie filling and cinnamon, lemon juice and powdered sugar, strawberries and whipped cream, bananas pineapple and coconut, whatever you want). Since these are sweet crepes, you should not use meats and cheeses to fill it - it just won't taste right with this recipe. If doing a proper crêpe du Nutella, then be generous with the nutella because nutella is the best thing on earth and you can never have too much nutella.


When you are done with this, eat, share, enjoy, and for the sake of humanity and clenliness: CLEAN UP THE MESS! It's awful to clean up after it gets hard (I know from experience because I missed several spots which are not rock solid clumps of yuckiness). This might need to be done before you eat, share, and enjoy. It is seriously a mess, even if you clean up as you go.
Despite the mess and the fact that it takes several hours, this is so much fun and tastes so good. I recommend trying it if you are a) adventurous, b) not hungry at the moment, c) have a lot of friend, and d) have nothing better to do with your day.
I'm sorry, by the way, for not posting this yesterday. Yesterday was...awful. The fire alarm went off in the middle of the shower. My dr's appointment lasted 1 hour and a half and required getting another 2 vials of blood taken from my body. I couldn't eat anything (and still can't). And everything appeared to be collapsing. Then, when my day finally calmed down, I decided to self inflict personal drama that turned out not to be drama at all and instead was seriously just my imagination (perhaps I'm going insane...maybe that's why my stomach's been hurting so much...this would not be much of a surprise...anyone who knows me knows that I'm completely crazy). Anyway, now tomorrow I have to cross town to determine if my spleen is enlarged (which, if it is, could be a sign of just about anything from mono to infection to blood disorder...

hurray!). On the bright side, if I gain the courage to ask (which knowing myself, I probably won't...I never have the courage to ask questions), I might be able to see the inside of my body tomorrow (which would seriously be the coolest thing ever, ever). We'll see what happens with that.
Anyway, crepes. Yes. Very good. One of the few things my body lets me eat at the moment and I am oh so glad of it. Seriously. Delicious. Enjoy! =)


Sunday, September 25, 2011

Vegan Banana Bread


Last week I bought a pound of bananas that became bruised on my bike ride home (perhaps because I put several cans and a half gallon of milk on top of them in my bag...). I ate 2 of the bananas over the week, but eventually they were too ripe to eat (the fact that they were already bruised allowed them to ripen much faster). So, the area around my bed (under which I keep all of my food) smelled of bananas these past couple days. But we couldn't eat them. So it came down to two things: either we could waste the bananas and throw them in the trash like so many unfortunate vegetables from our fridge, or we could make banana bread. I think we made the proper choice.

Anna being vegan, we decided to make vegan banana bread from scratch. This actually meant that we used fewer ingredients, which is always a plus in dorm cooking. And it actually tasted much better than normal banana bread. So, I will share the recipe with you.
Since there are so many ingredients, I will share with you ahead of time what they were.

4 very ripened bananas
2 tablespoons of vegetable oil
1 1/2 cups of flour
3/4 cup sugar
1 teaspoon salt
1 teaspoon baking soda
1/2 cup of walnuts
Cooking spray
2 bread pans
1 fork
1 spoon
1 knife

First, in a large bowl (or sauce pan, in our case, since we didn't have a mixing bowl), mash the 4 bananas. We did this using a fork, which worked pretty well. They should be mashed to the point that it looks creamy. Then, mix in the 2 tablespoons of vegetable oil.
Next, add the flour, sugar, salt, and baking soda. Stir this well. This can be done with any spoon you happen to have.
Then, chop the walnuts into coarse pieces (into 1/2s and 1/3s). This can be done with a standard knife. Mix the nuts into the bowl. (If you are allergic to nuts or simply don't like them, you can of course skip this step.)
Now, pour the well blended batter into 2 greased bread pans. (As bread pans turn out to be quite expensive, we bought the disposable metal kind from the baking section for only a couple dollars, which worked just fine as a pan). If you are using walnuts, you can add some whole onto the top, to make a pretty design. However, they tend to crisp easily in the oven, so I do not recommend this.
Finally cook at 350 degrees (make sure to preheat the oven before you put the bread in) for anywhere between 45 minutes and an hour. We're not quite sure how much time it needs because we had ours in for an hour and the edges started to get quite crispy after 50 minutes, so we assume 45 minutes is probably a good time. Just keep checking on it every now and then.
Remove from the oven, and let cool. Then, you'll be ready to eat, enjoy, and clean up the wonderful mess (I recommend doing this as you wait for the bread to cook or as you wait for it to cool, as you'll have quite a bit of time to kill).


This recipe turned out really well. The inner part of the bread was super chewy and delightful. And the outer part of the bread was strong enough to keep intact. As it's not made with butter like the standard recipe, it does not taste buttery. Instead, you really get the natural flavors of the banana. It is a tad sweet, but it's banana bread, it's supposed to be sweet.
I HIGHLY RECOMMEND THIS RECIPE. It was honestly so good. And as it was baking, people from all over the dorm kept coming by to tell us how good it smelled (you could smell it everywhere on our floor...we became quite the popular girls). If you want to, you could double the recipe and make enough to share with the rest of the floor, which would make you super popular. But, we didn't have enough bananas (or foresight) to do that ourselves.